

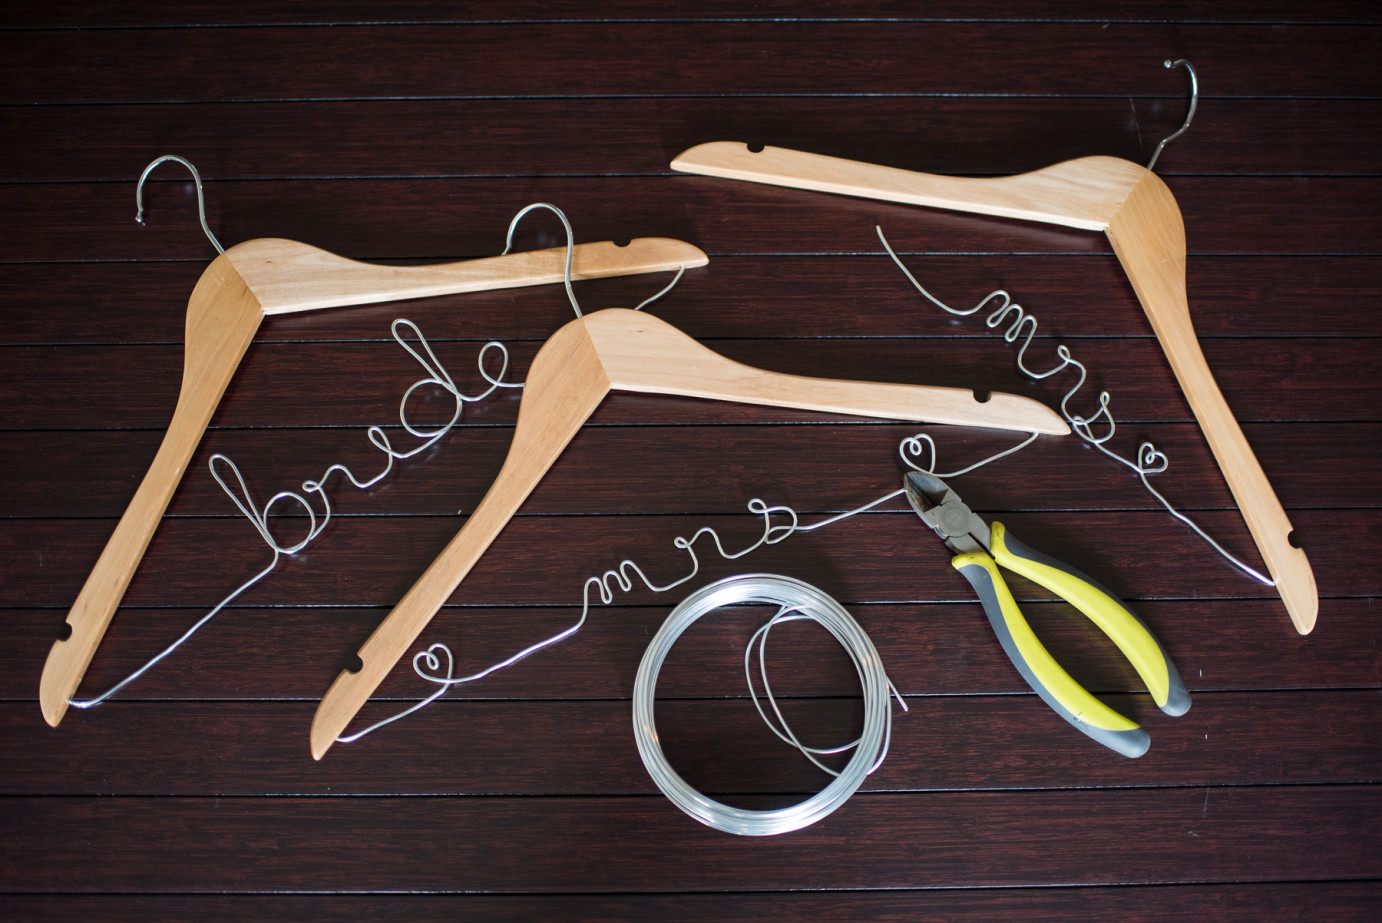
I don’t know how many times I’ve shown up to a wedding to start taking detail photos and there this beautifully detailed wedding dress is, on the UGLIEST white/clear/black plastic hanger. Because of this crazy phenomenon, I started bring my own boring, but better looking wooden hanger to weddings for better dress shots, but then I had an epiphany. You can buy customized wedding dress hangers, but they’re usually upward of $40. I have a hard time paying that much for a hanger, regardless of how amazing it is, unless it was plated in gold, so I like to think of myself as pretty crafty, and I knew I could resolve this problem. Pinterest to the rescue! I knew there had to be others out there with the same mindset as myself who had created this hangers themselves, and I was right! So what better way than to show all of you how its done!! First let’s talk supplies.
Hangers–any wooden ones will do
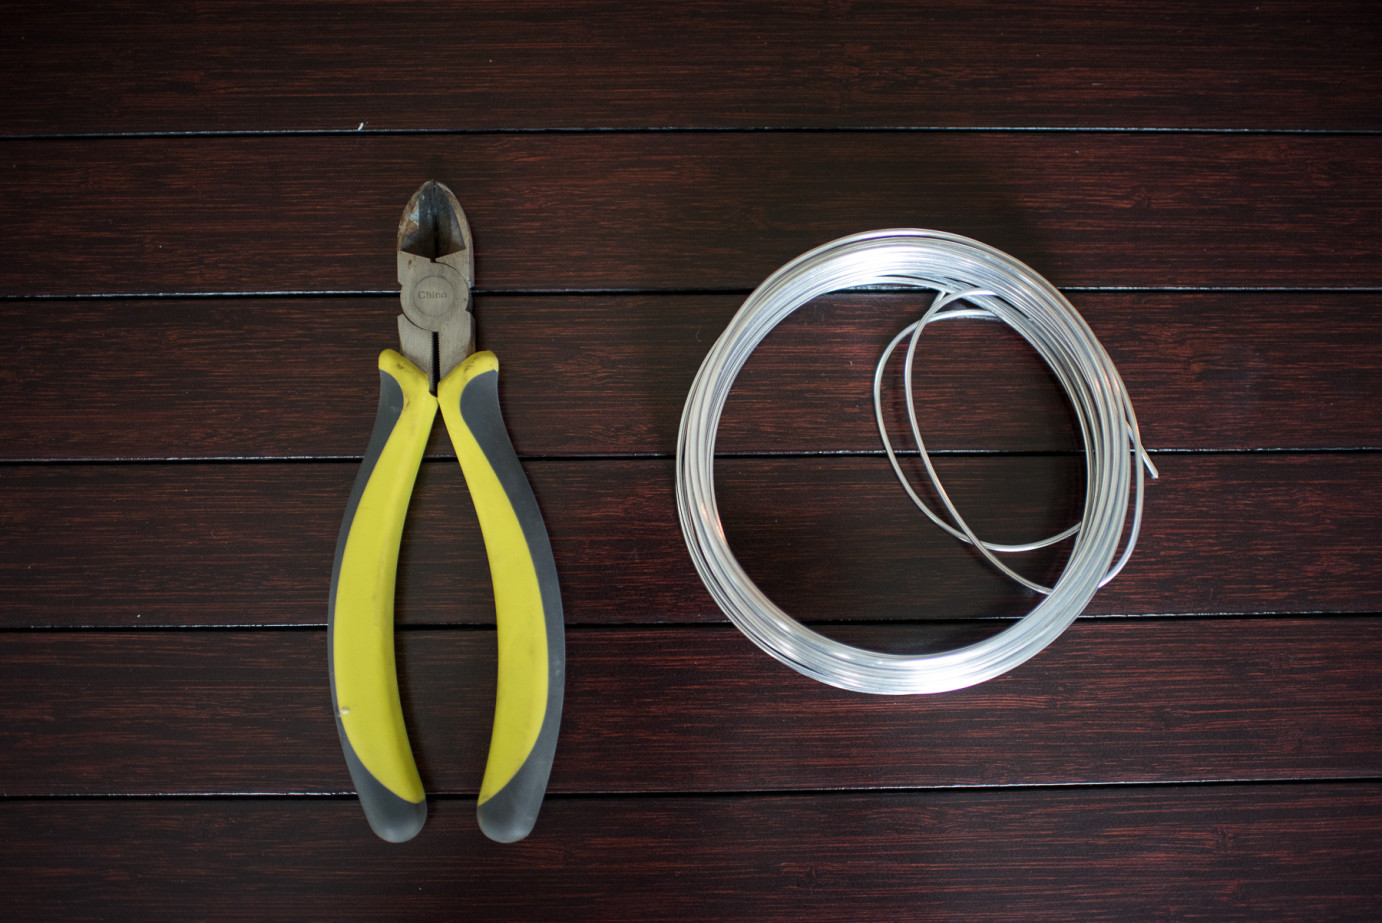
12 gauge aluminum craft wire– I bought this off Amazon. Check the link HERE.
A power drill and a 3/32″ drill bit
Glue–other that have made these used wood glue, but I used Gorilla Glue Epoxy. It gets to be sticky consistency before it hardens and I didn’t have to sit and hold the wire in place.
Paper–this is for your stencil
Ruler-To make sure your line is straight on your stencil
Pencil- In case you mess up making your stencil
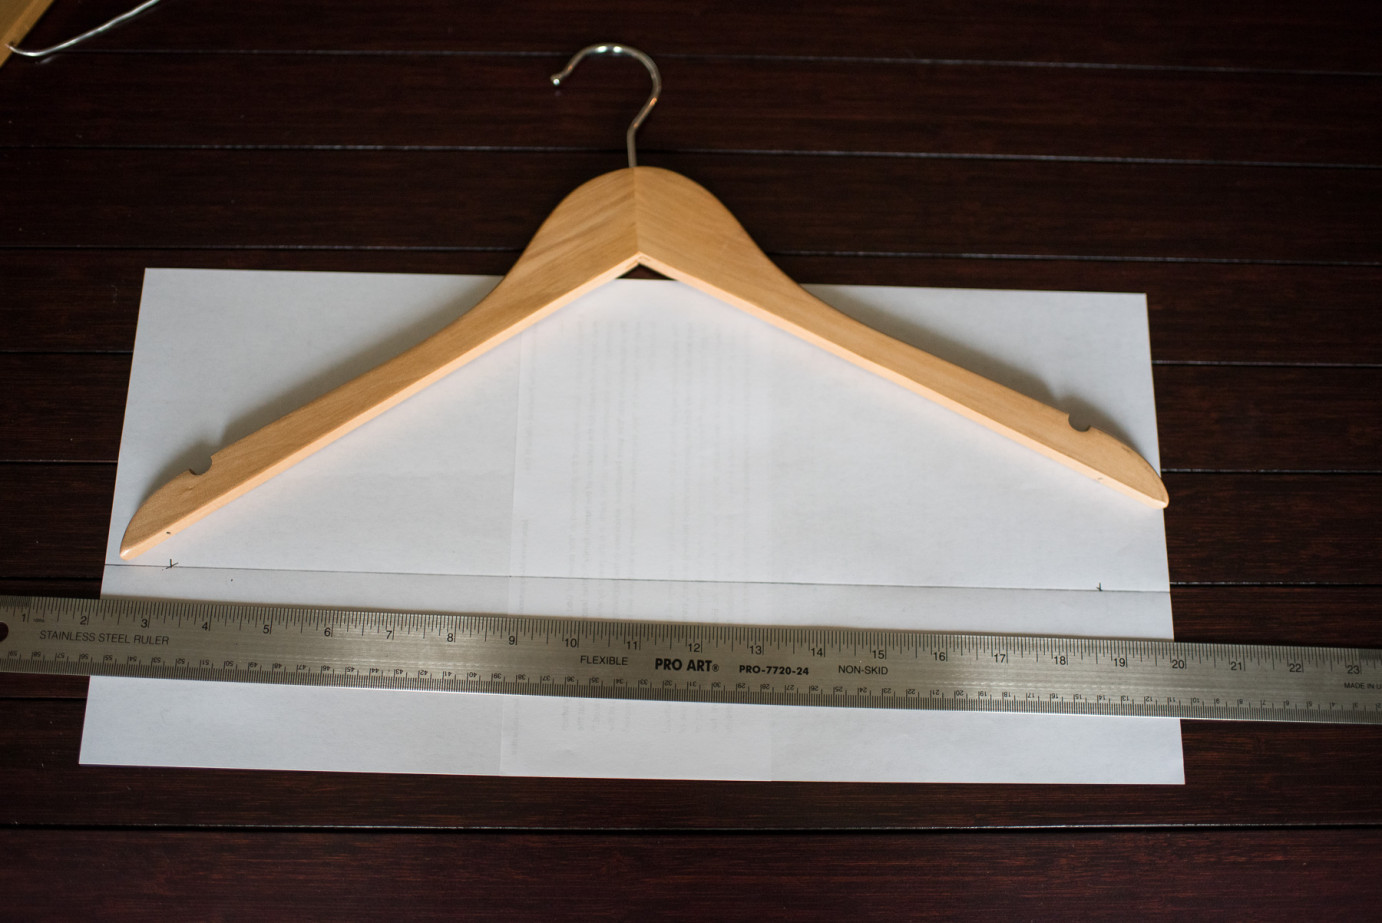 Get all your supplies together, then it’s time to start! First off, take your stencil and draw a straight line on your paper. This will be the biggest help when trying to bend the wire straight! You can bend the wire into whatever shape you would like, but some ideas are “bride,” “mrs,” “or even “mrs. your-name-here.”
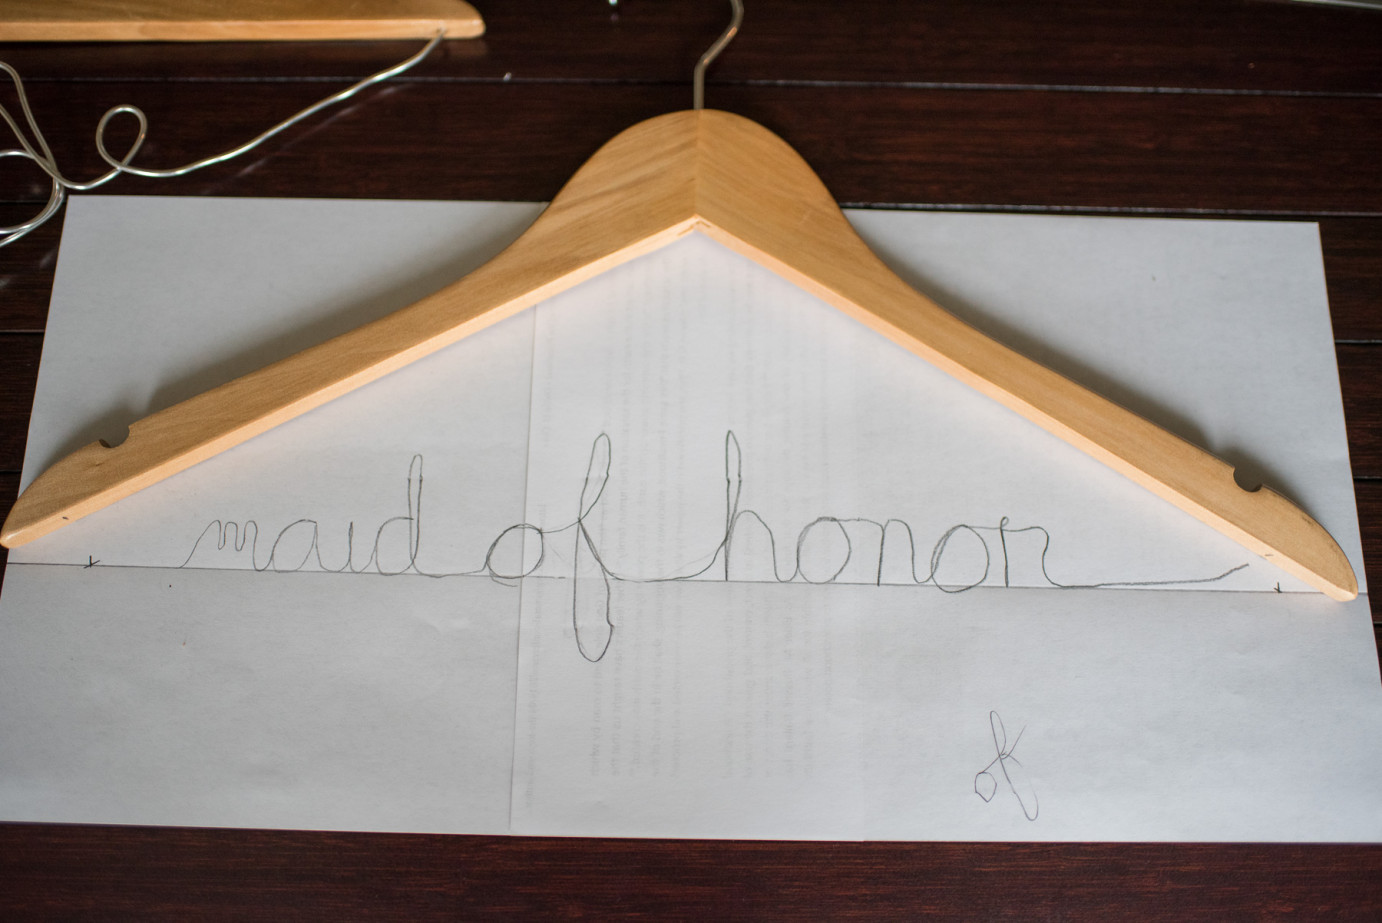 Here is where your knowledge of cursive writing will come in handy (side note-I can’t believe they don’t teach that in school anymore. This makes me feel old.)! I used “maid of honor” because I already have a mrs. and a bride hanger to use for my brides. Before you make your stencil, you want to mark on your paper how long of a space you have, as well as the hanger so you know where you measured. Once you have the stencil the way you want it, start bending your wire! Make sure you have enough wire in front of the words as well as after! You don’t want to cut it too short! Just follow your stencil With the bends of the wire. Some letters will be tricky, but you’ll get the hang of it!
 Once you have the wire bent out into the shape of your stencil, then you get to do the fun part. Remember where you marked the hanger? You want to drill a hole here so the wire will stick into it. You want to go far enough into it that the wire has some tension, but not through the hanger. Before you cut the wire, make sure that you have enough wire to stick into BOTH sides of the hanger. Place your glue into the hole, then put the wire into the holes. I used the Gorilla Glue Epoxy that dries in 5 minutes. After about 3 minutes, it gets tacky and so you don’t have to sit and hold the wire in the hole.
 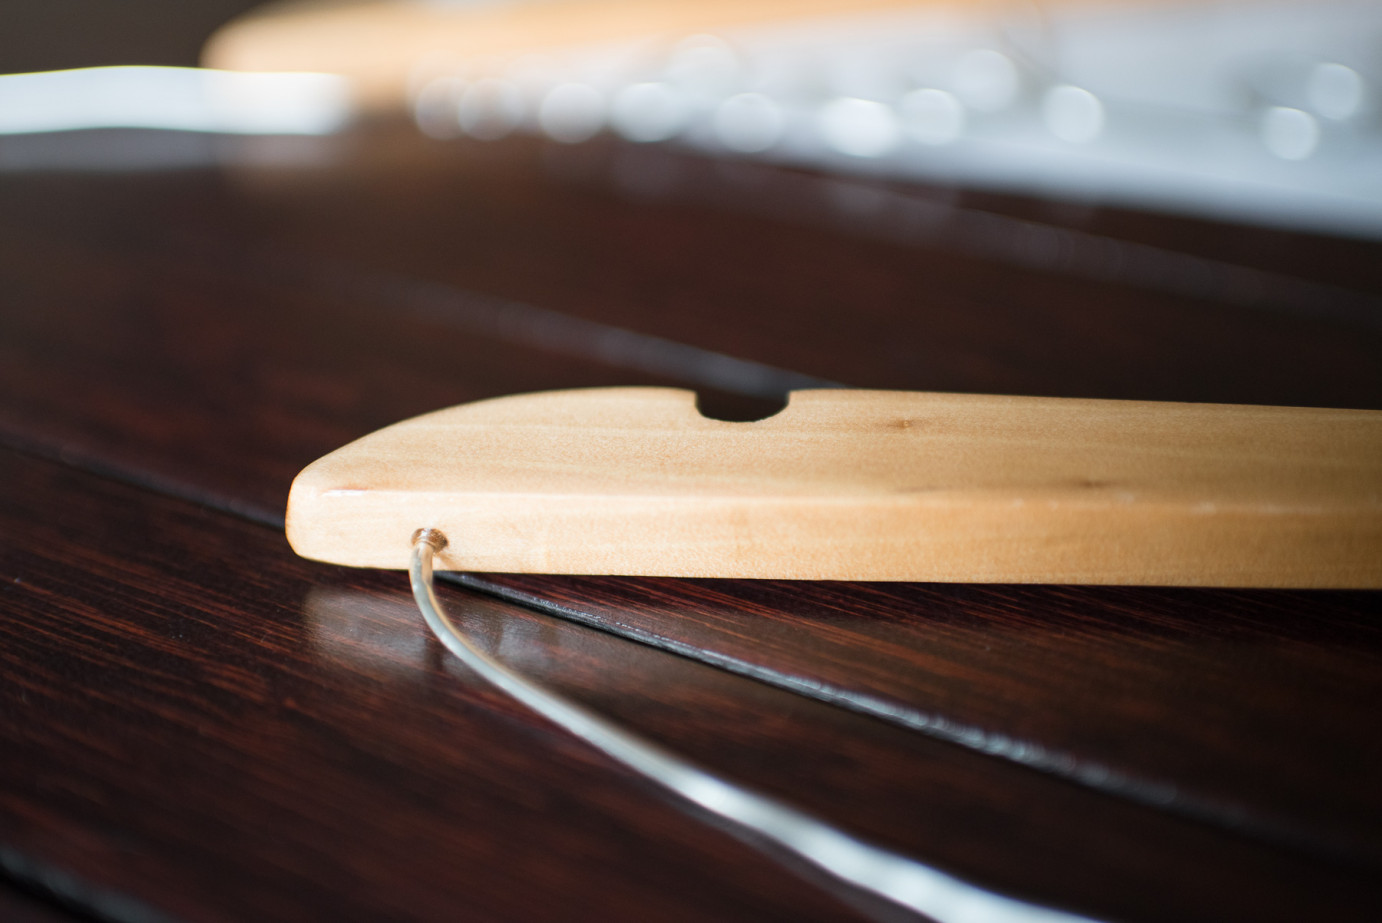 I just let the hanger sit for about a day to be sure the glue was set completely before I messed with the hanger, and voila!
There’s other ways you can customize your hangers! You can paint the hanger before you add the wire, or add a cute ribbon your wedding colors. For the price of the wire and the hangers, you could even make your bridesmaids hangers too!! 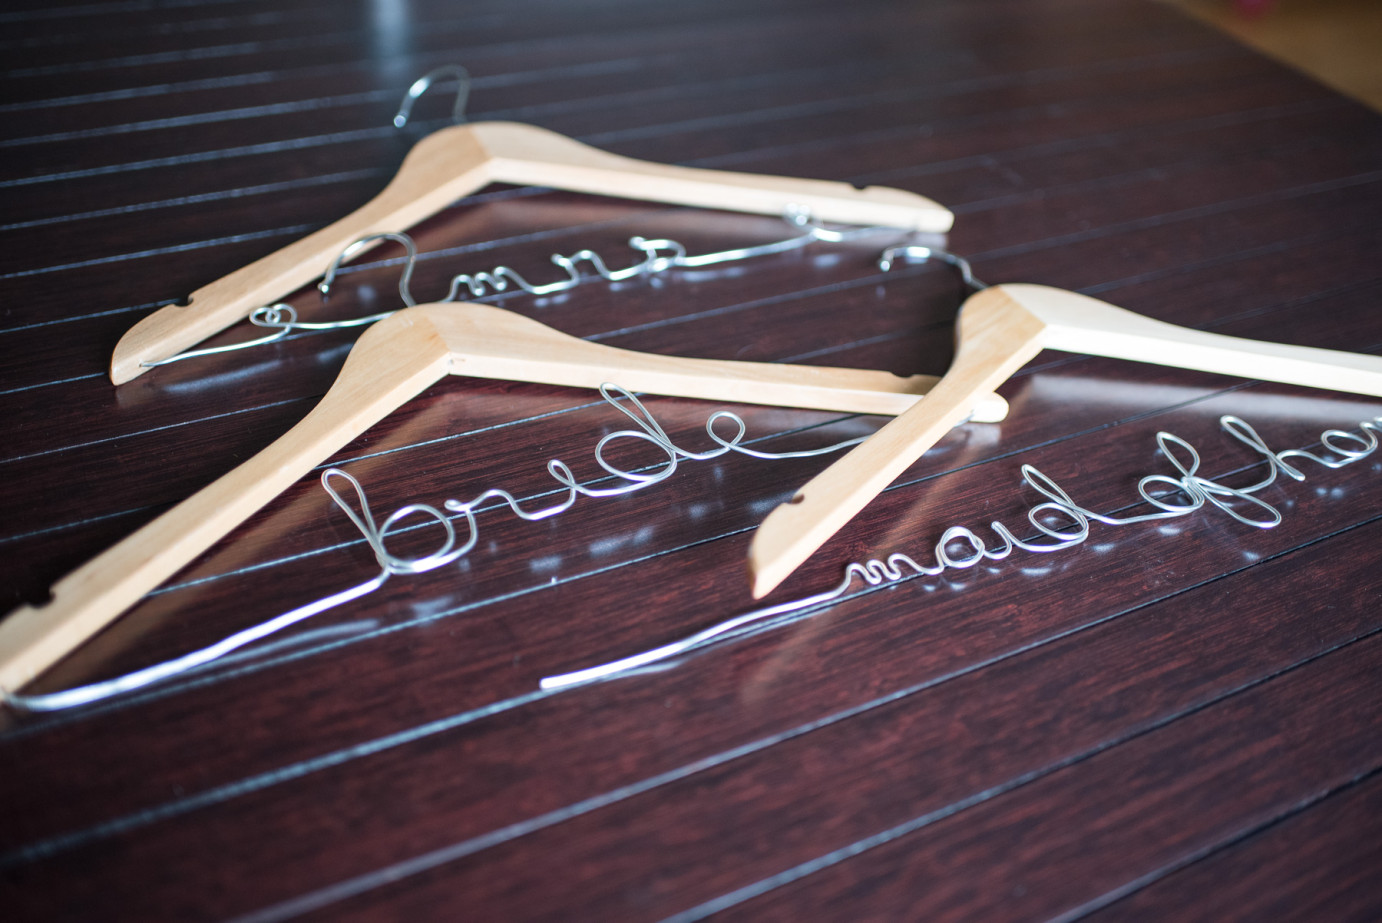 How are you customizing your wedding and making it more you!? Comment here and share your ideas! 😀


+ COMMENTS
add a comment